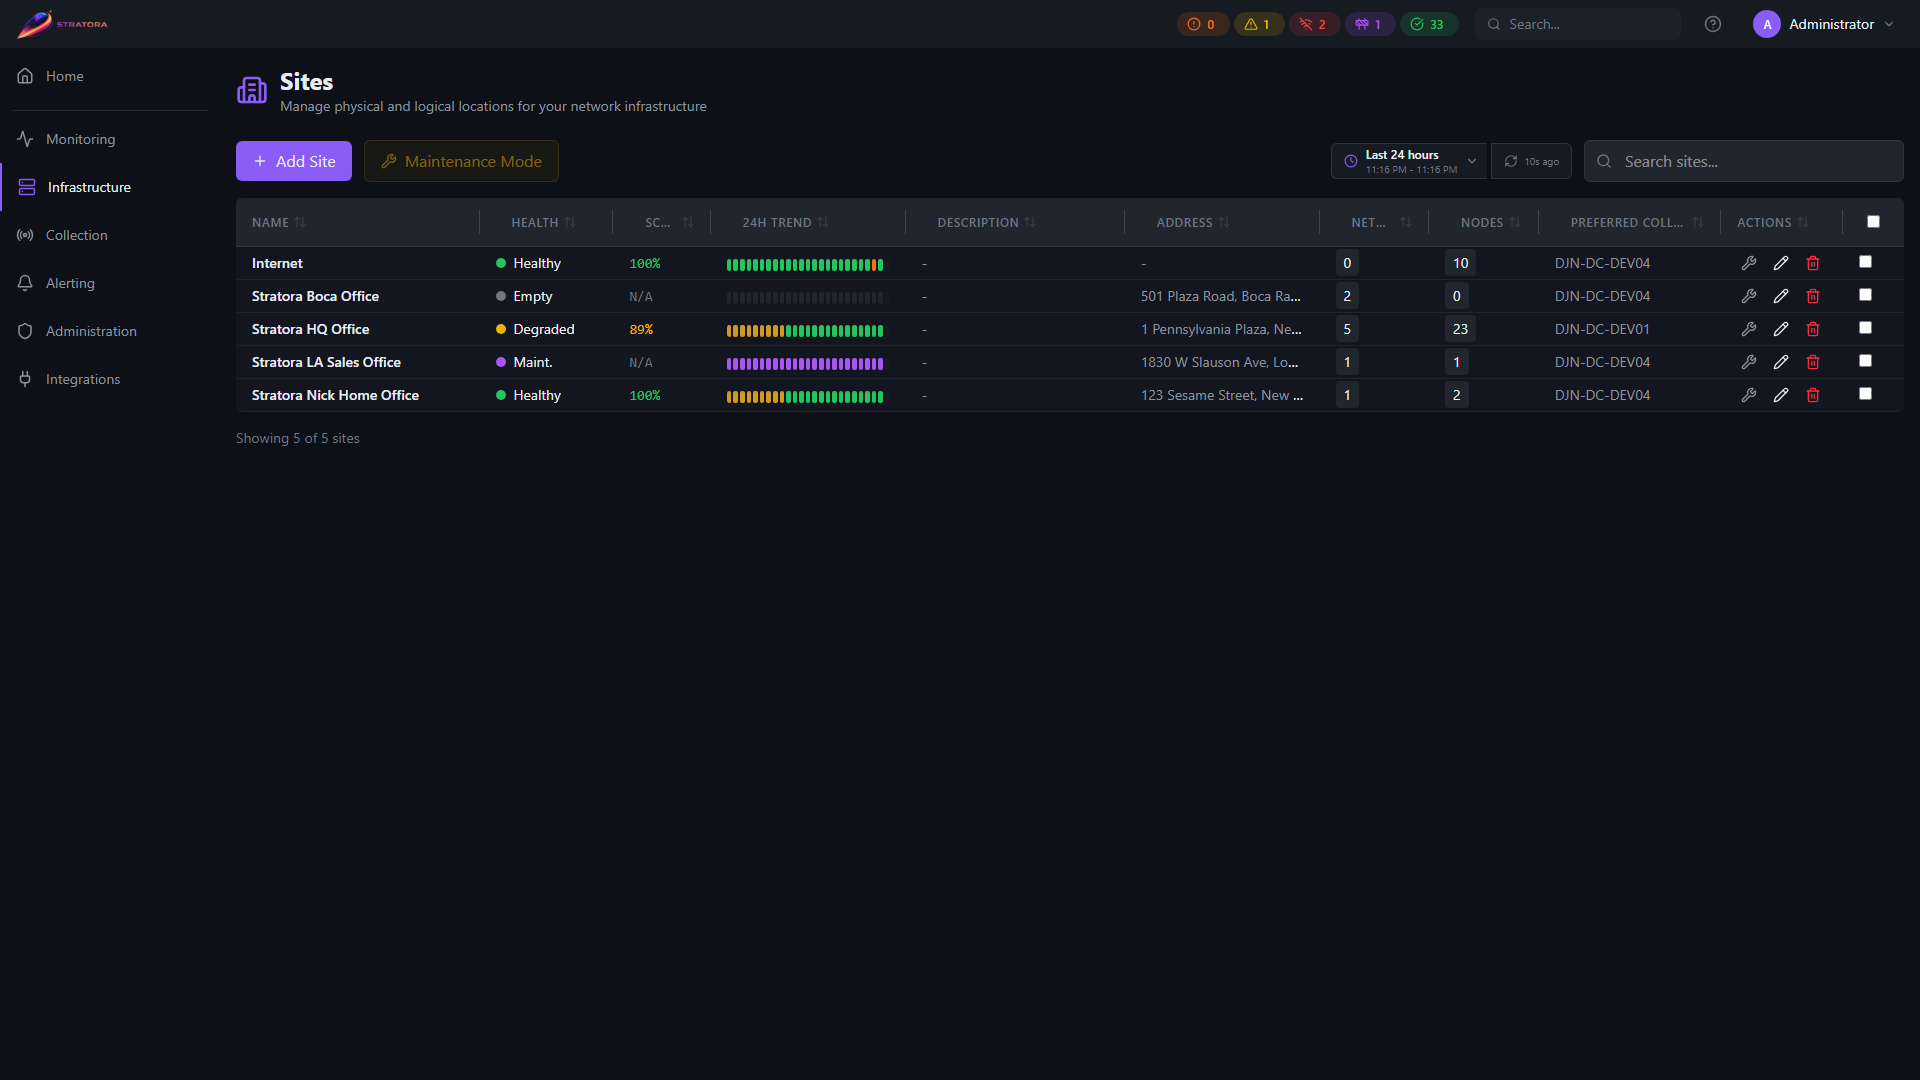
Sites
A site represents a physical location or logical grouping of infrastructure — a data center, branch office, factory floor, or remote closet. Sites are the top-level organizational unit in Stratora. Every node must belong to a site.
Sites serve three purposes:
- Organization — group nodes by location so operators can quickly scope dashboards, alerts, and views to what matters
- Collector assignment — each site has a preferred collector, so nodes added to a site automatically get polled by the right collector in the right network
- Network documentation — sites contain network definitions (CIDRs, VLANs, gateways) that feed into IPAM and discovery scans
Creating a Site
Navigate to Infrastructure → Sites and click Add Site.
| Field | Required | Description |
|---|---|---|
| Name | Yes | Display name (e.g., "HQ Data Center", "Building 7 MDF") |
| Description | No | Notes about the site |
| Address | No | Physical street address |
| Latitude / Longitude | No | Coordinates for world map positioning |
| Preferred Collector | No | Default collector for nodes at this site |
If you set a preferred collector on the site, new nodes added to that site will automatically be assigned to that collector. This is the easiest way to ensure remote-site nodes are polled by the correct local collector.
Assigning Nodes to Sites
Every node must belong to a site — Stratora does not allow orphaned nodes. You assign a site when:
- Creating a node manually — site is a required field
- Importing from discovery — nodes are assigned to the site where the scan was run
- Agent enrollment — you assign the site when approving the agent
Moving Nodes Between Sites
To reassign nodes to a different site:
- Go to Infrastructure → Nodes
- Select one or more nodes using the checkboxes
- Click Actions → Move to Site
- Choose the target site
This is a bulk operation — you can move up to 500 nodes at once.
Moving a node to a site with a different preferred collector will trigger a collector reassignment. The node's metrics will briefly pause while the old collector drops the target and the new collector picks it up (typically within 10–15 seconds).
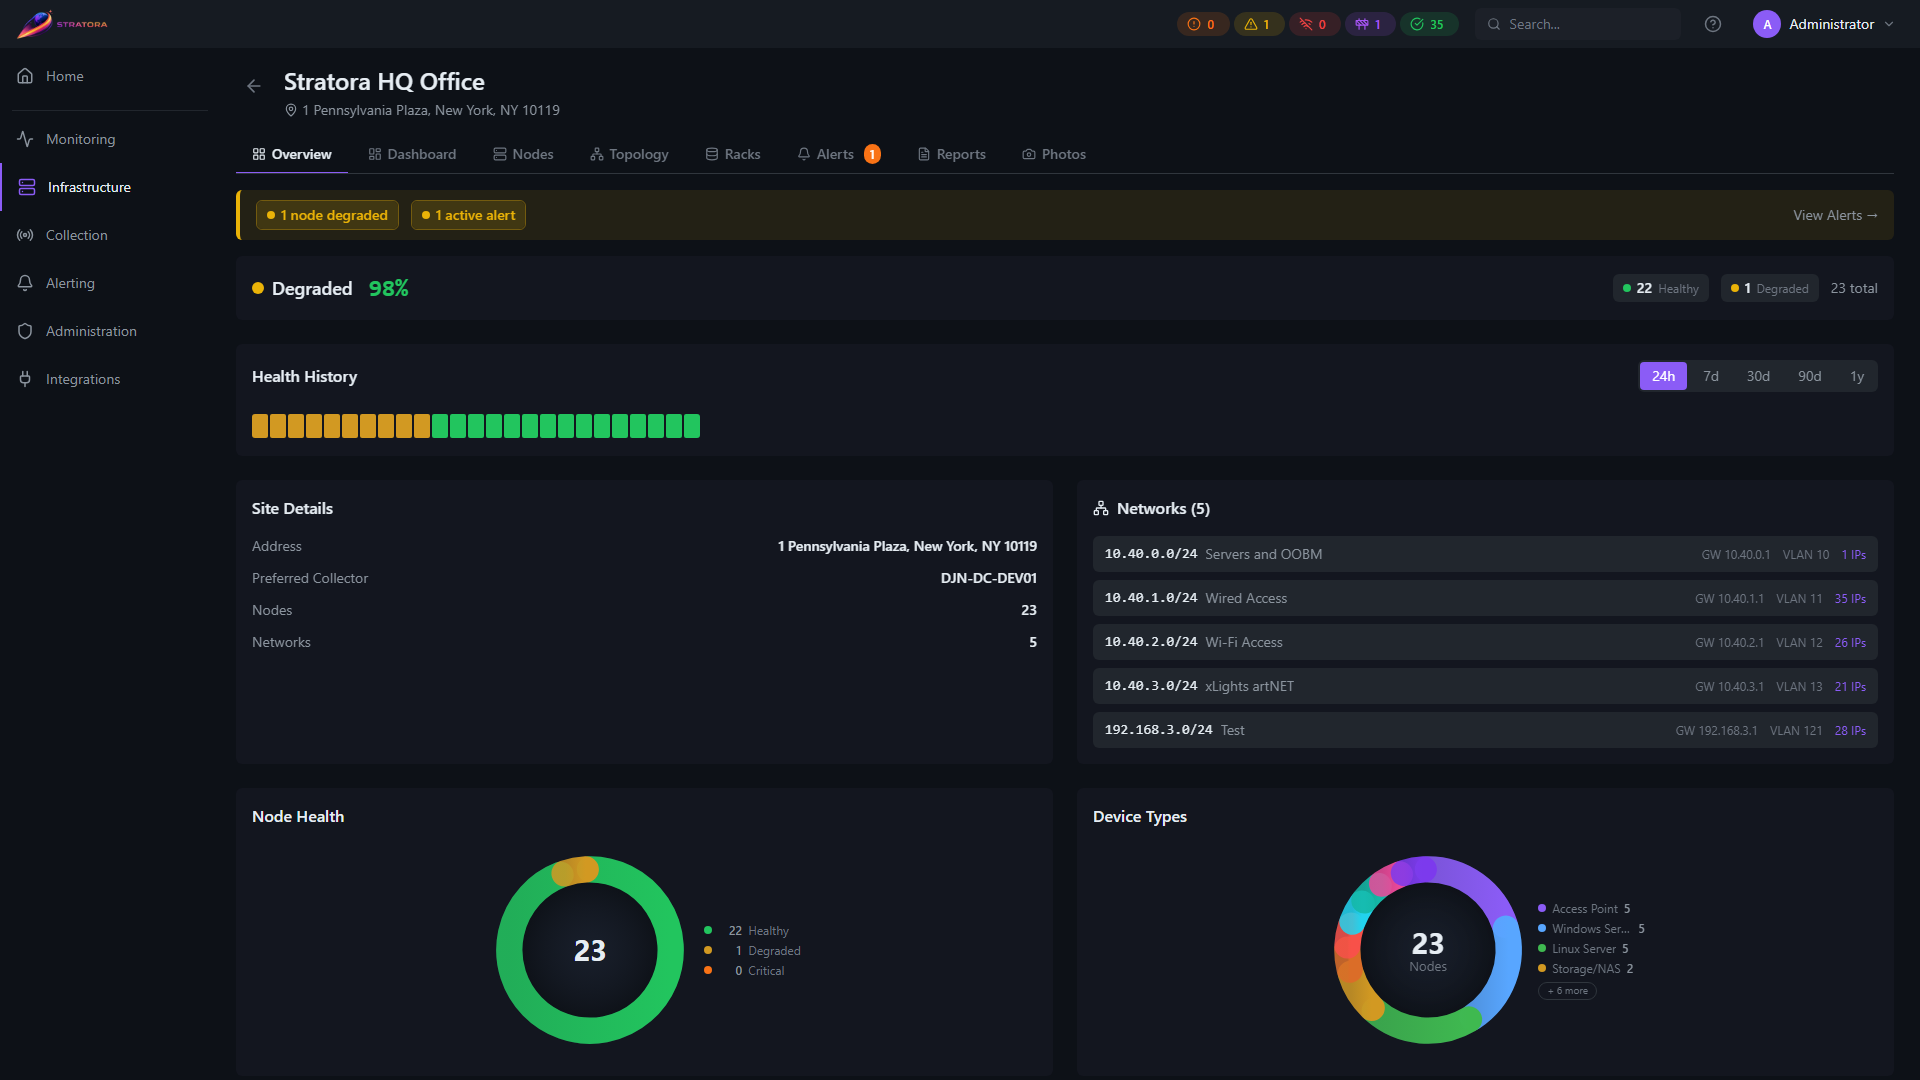
Site Health
Each site has an aggregated health status derived from its nodes:
| Status | Meaning |
|---|---|
| Healthy | All nodes at this site are healthy |
| Degraded | One or more nodes have warning-level alerts |
| Critical | One or more nodes have critical-level alerts or are offline |
| Maintenance | The site is in a maintenance window |
The site health view shows a summary with counts of healthy, degraded, critical, and offline nodes. This is available from:
- Dashboard → Sites overview — card view with health indicators per site
- World Map — if latitude/longitude are set, sites appear on the map with color-coded health
- Site detail view — full breakdown of node health within the site
Preferred Collector
Each site can have a preferred collector — the default collector that polls nodes at that location.
Why This Matters
In distributed deployments, you typically have one collector per physical site. The preferred collector setting ensures:
- New nodes added to the site are automatically assigned to the correct collector
- Discovery scans at the site use the local collector's network reach
- Operators don't need to manually pick a collector for every node
Setting the Preferred Collector
- Go to the site's detail view
- Edit the site and select a collector from the Preferred Collector dropdown
- Save
You can override the preferred collector on individual nodes. The site preference is a default, not a hard constraint.
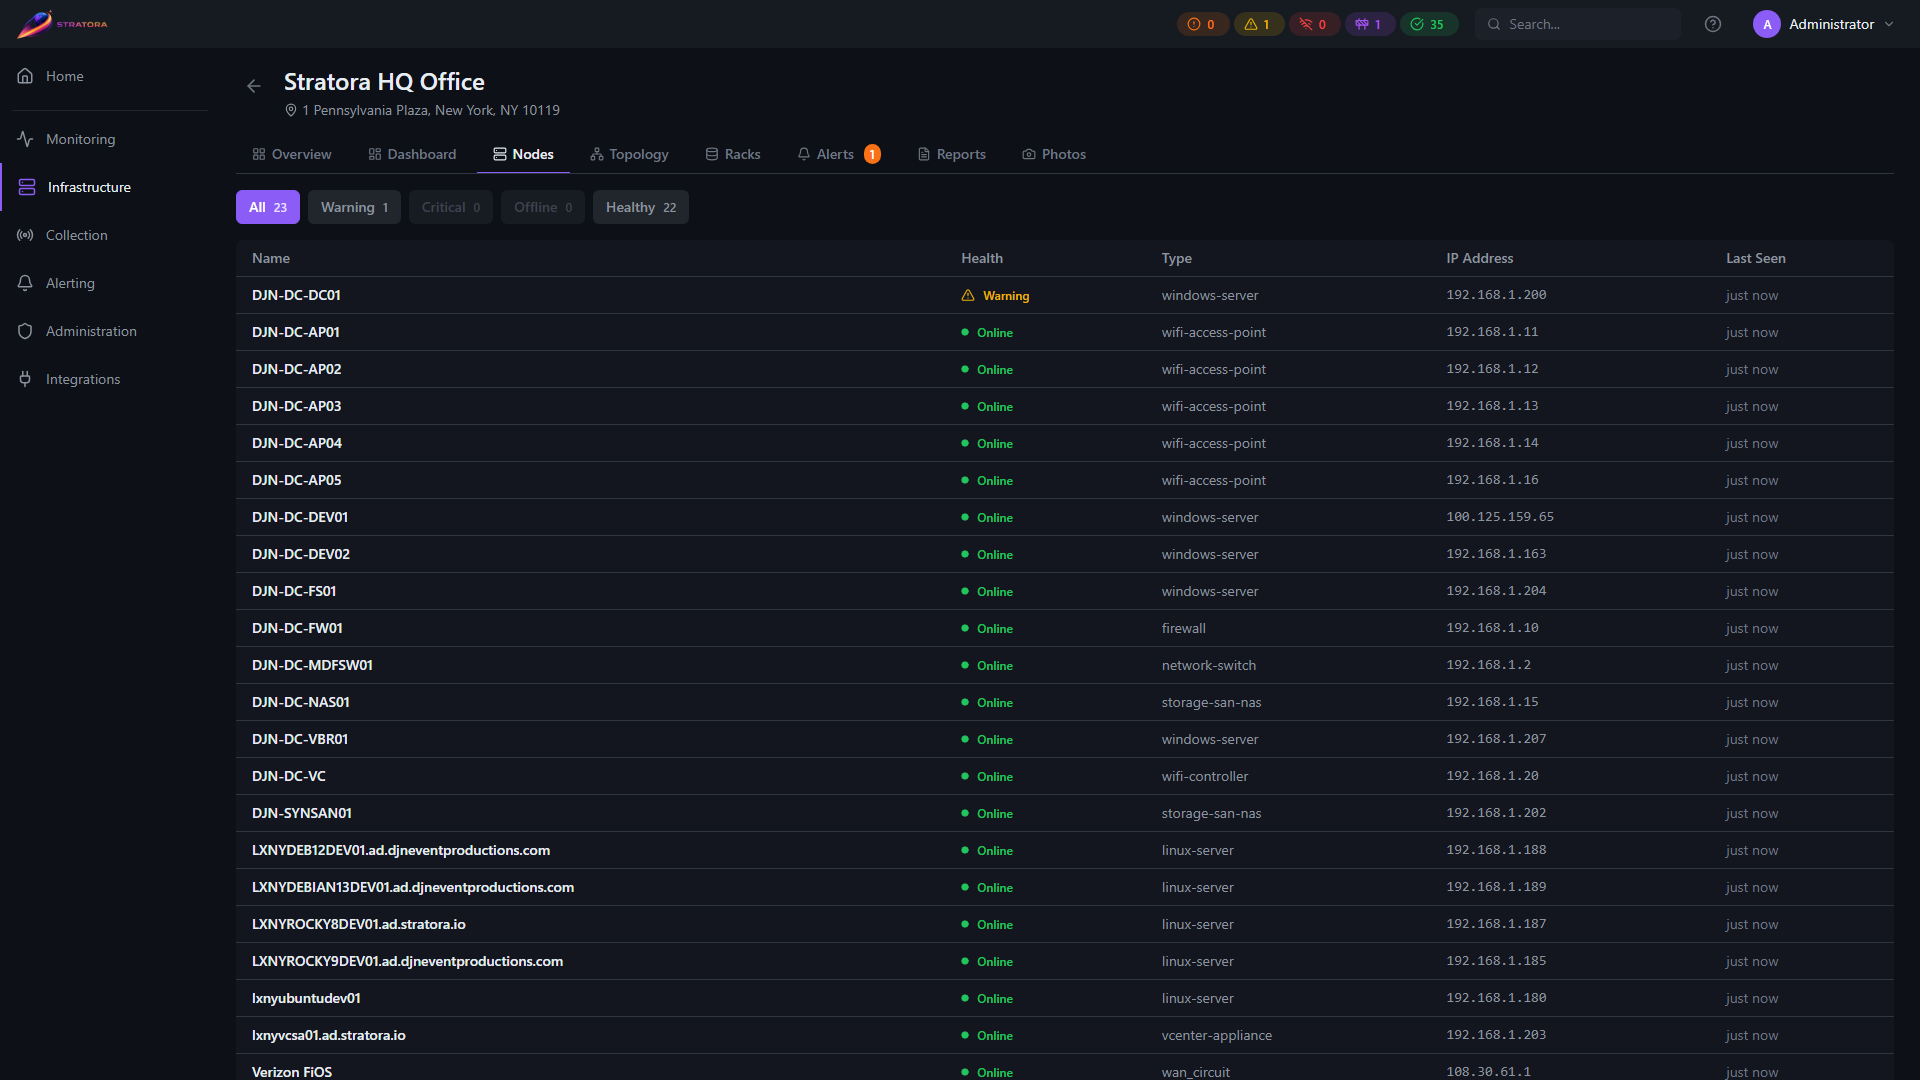
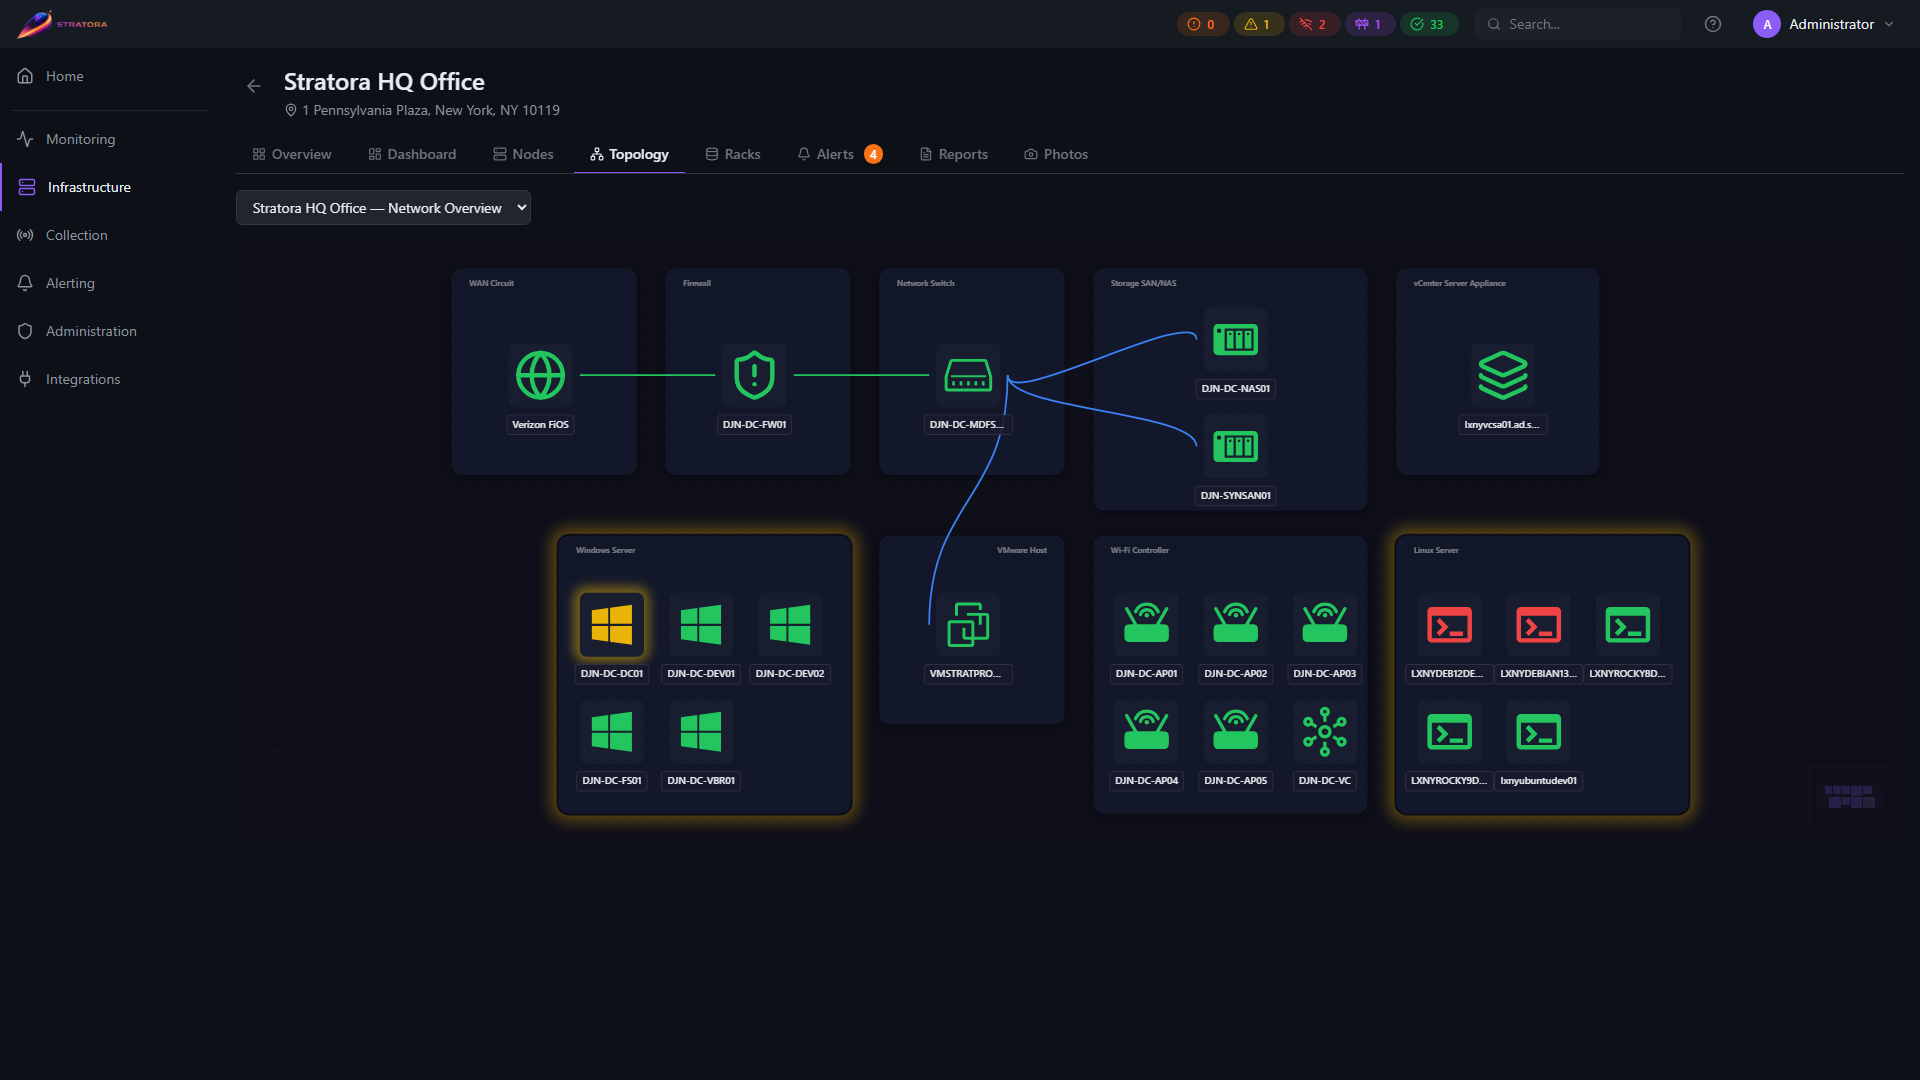
Site Detail Page
Clicking any site opens the site detail page, which provides a complete view of everything at that location across eight tabs.
| Tab | Content |
|---|---|
| Overview | Health score, 24h health history, site details, IPAM networks, node health breakdown, device type breakdown |
| Dashboard | Auto-generated site dashboard with live metrics panels |
| Nodes | All nodes at this site — health status, type, IP address, last seen |
| Topology | Network topology map scoped to this site |
| Racks | Rack diagrams for this site |
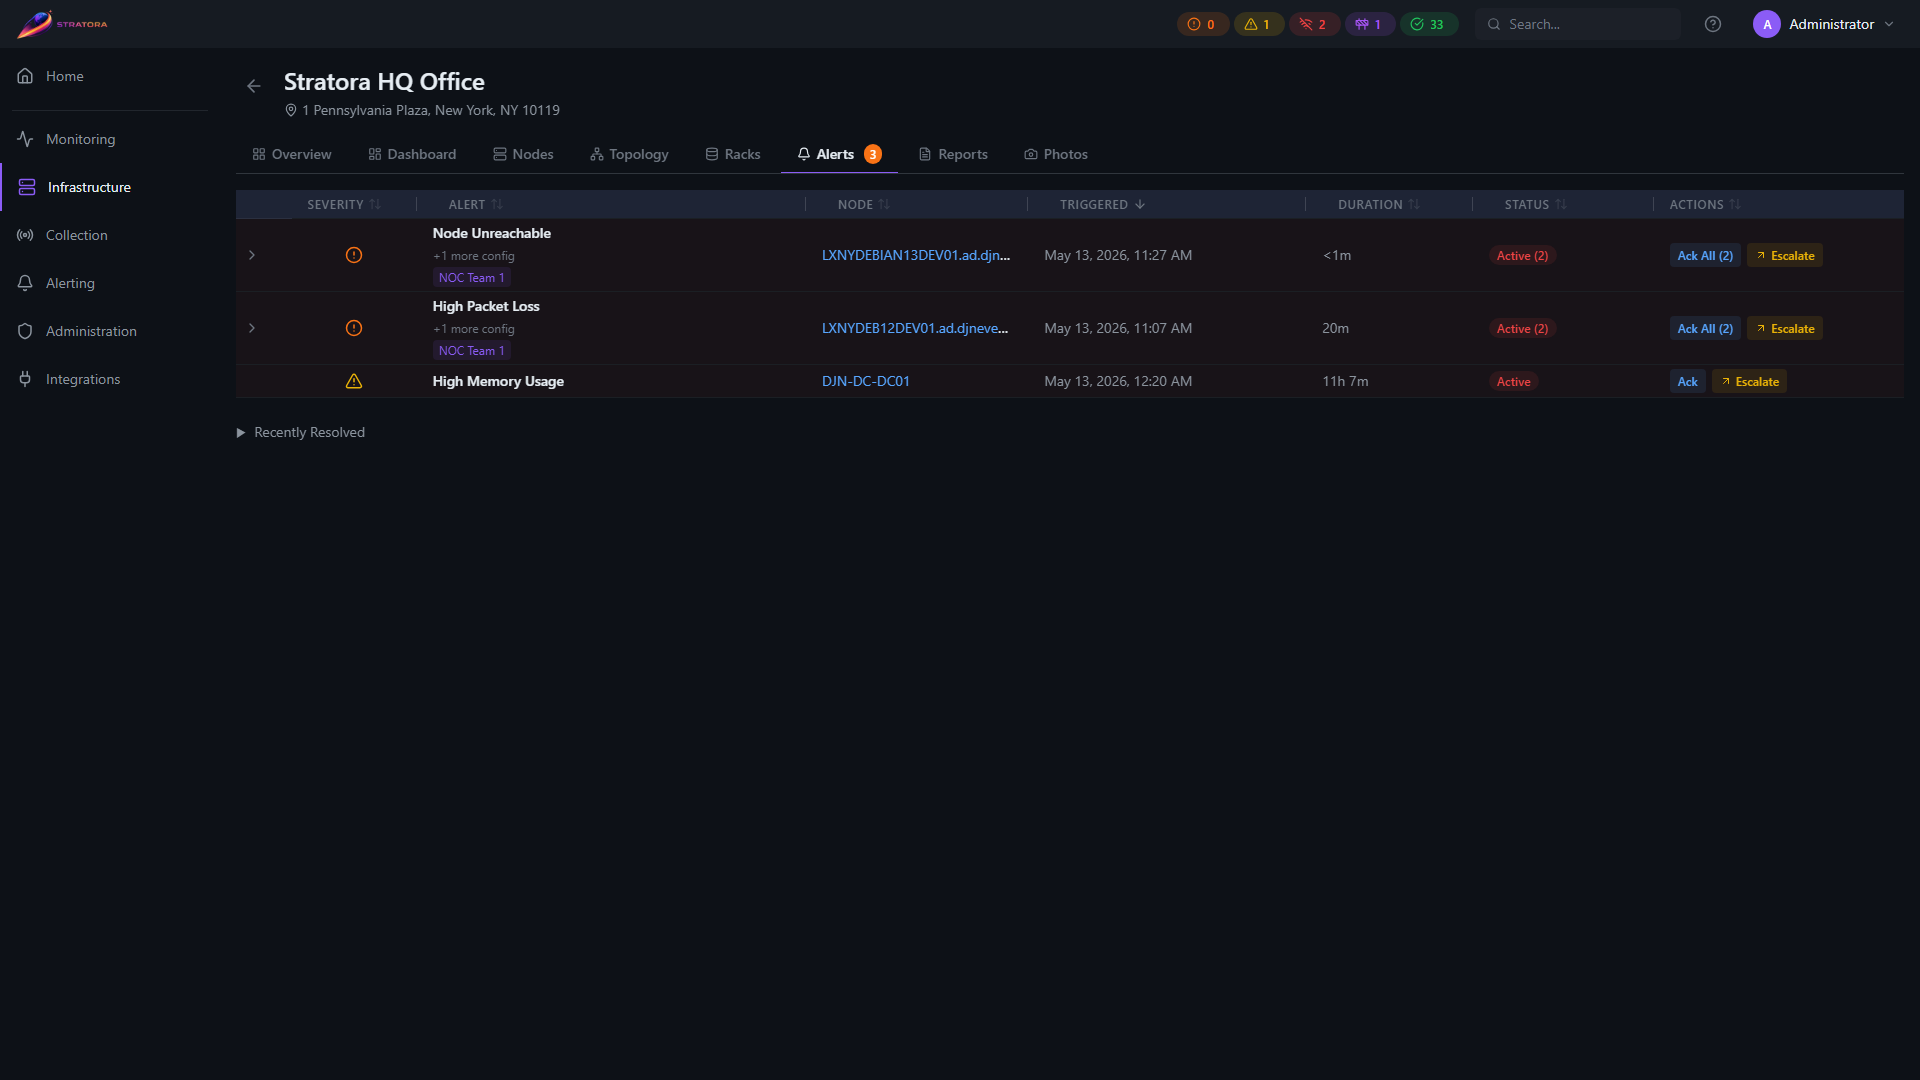
| Alerts | Active and recently resolved alerts for nodes at this site |
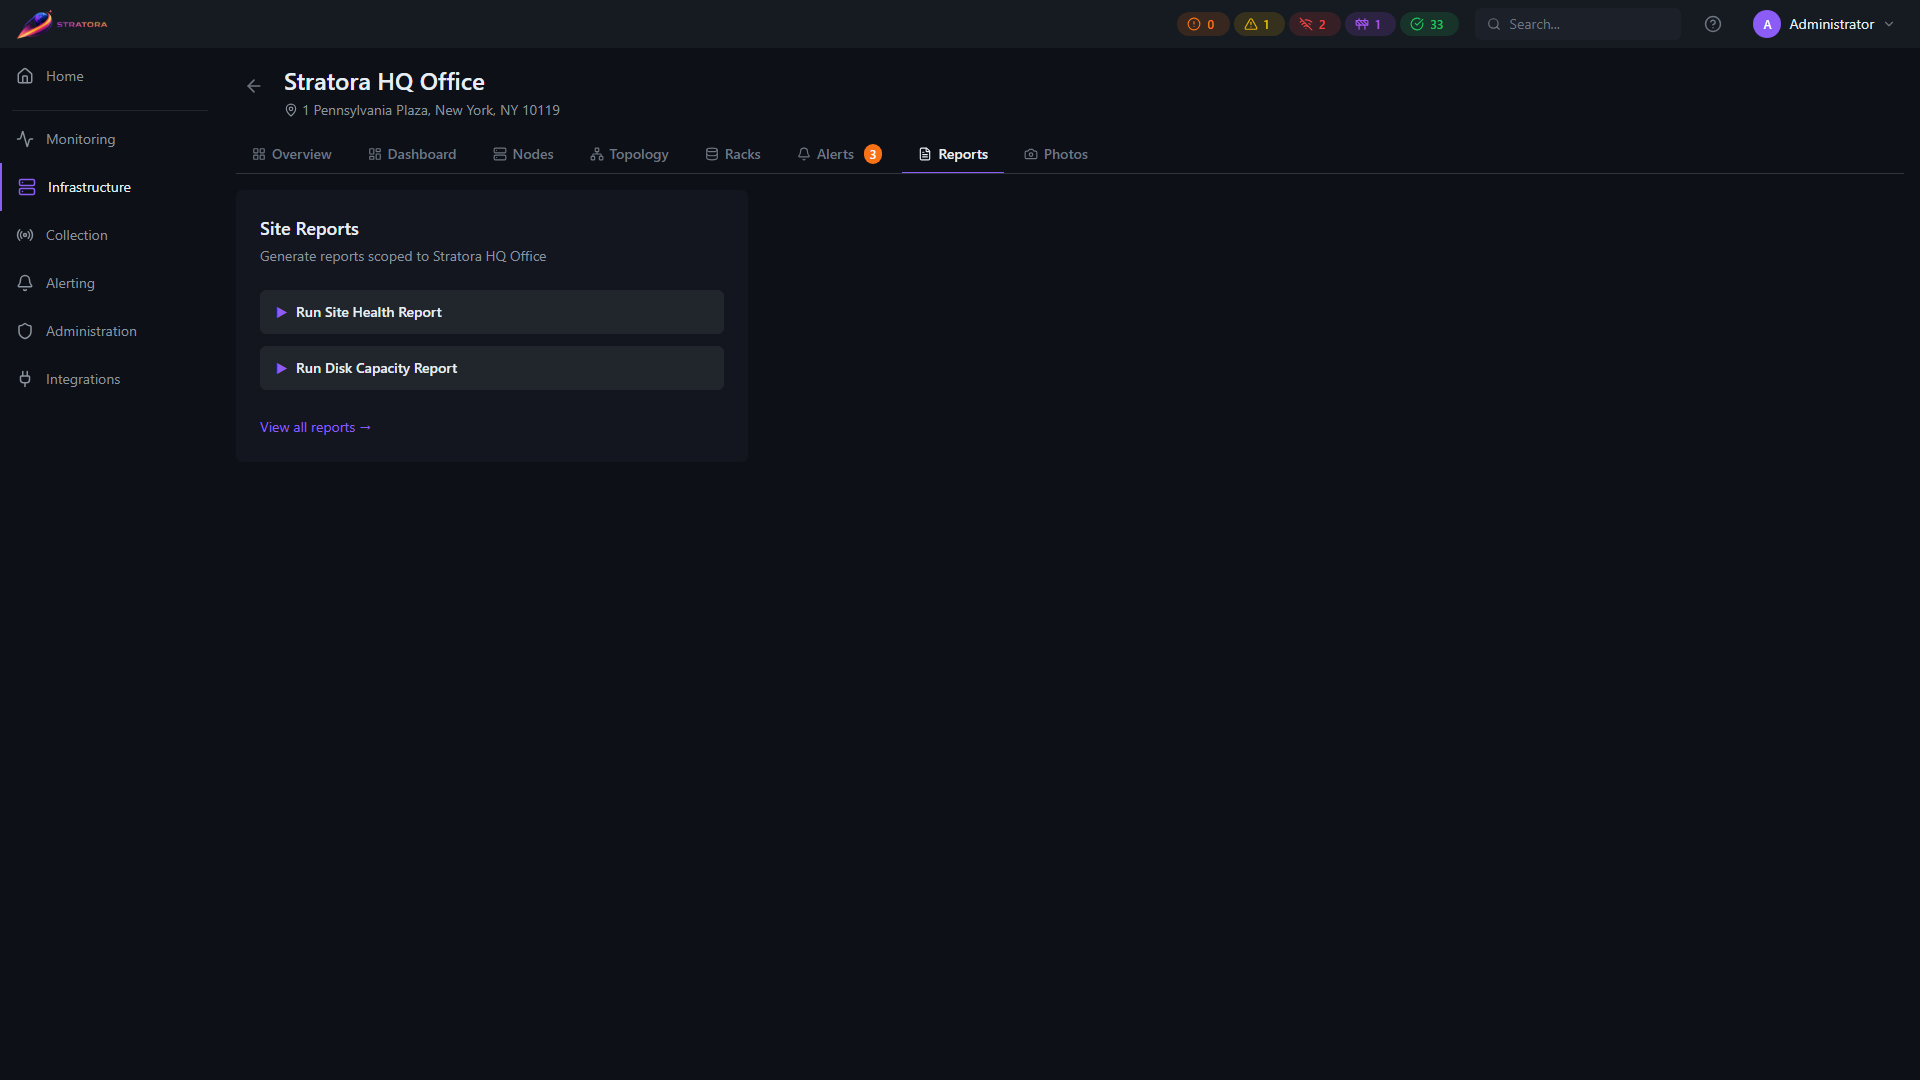
| Reports | Shortcuts to run site-scoped Site Health and Disk Capacity reports |
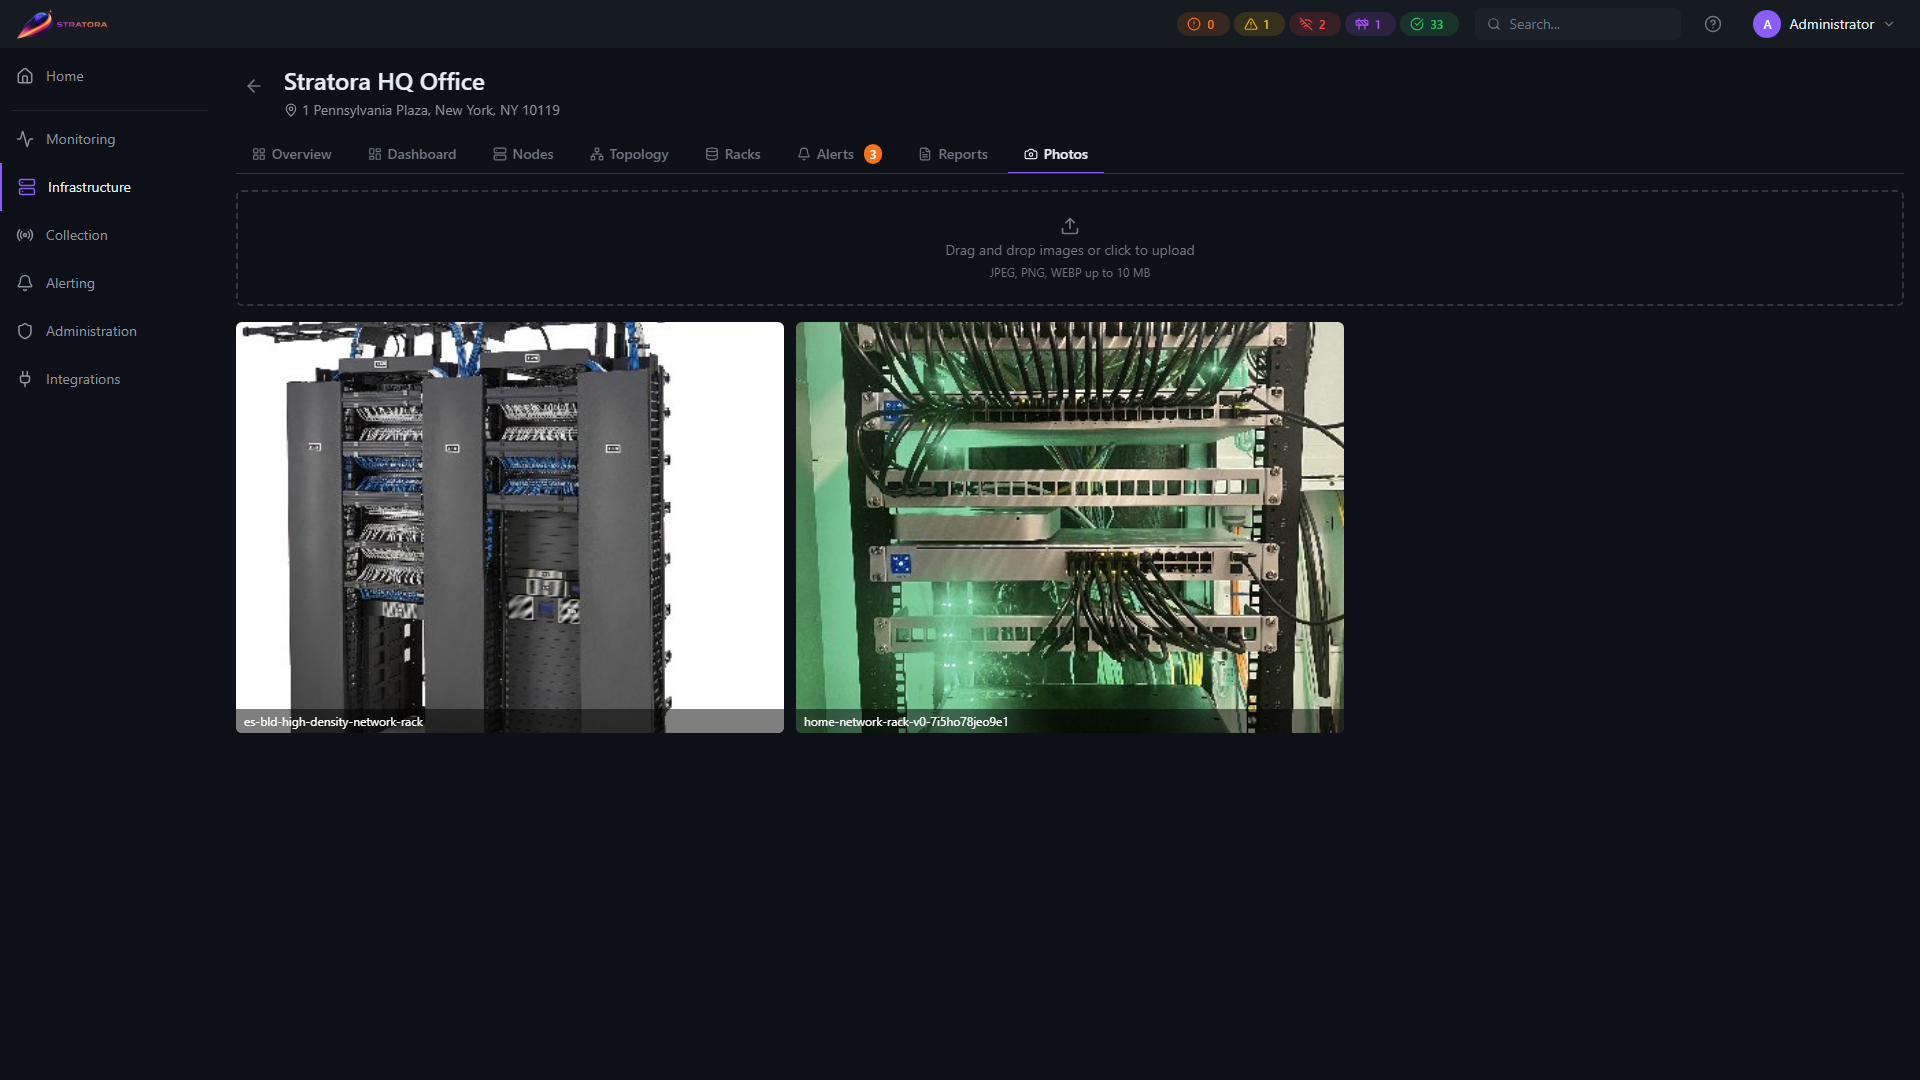
| Photos | Site photo gallery (see Site Photos) |
Overview tab
Nodes tab
Topology tab
Racks tab

Alerts tab
Reports tab
Photos tab
Networks
The Overview tab shows all IPAM subnets assigned to this site. Click any subnet row to navigate directly to that subnet in the IPAM module.
Filtering by Site
Most views in Stratora support site-based filtering:
- Node list — filter by site to see only nodes at a specific location
- Alerts — filter alerts by site to focus on a location during an incident
- Dashboards — scope dashboard views to a single site
- IPAM — view subnets and addresses scoped to a site
- Reports — generate per-site reports for health summaries and compliance